
Tech
How do I migrate my Google Drive content over to Microsoft Office 365?
A guide to migrating your Google Drive files into OneDrive (Office 365).
A company that has migrated from Microsoft 365 to Google Workspace likely uses OneDrive for storage and sharing.
You can move data from OneDrive to Google Drive in this tutorial. The method you choose is based on your comfort level.
To transfer files from OneDrive to Google Drive, find a method you feel comfortable with and it will result in twice the results with half the work.
Learn what method of preference you’d like to use for the transfer to ensure migration success.
Sync OneDrive with Google Drive using Google Takeout
There are two ways to migrate data from OneDrive to Google Drive. The first is to sync your OneDrive with Google Drive.
The second is by exporting the contents of OneDrive into a separate folder on your computer and then importing it into your new account in Google Drive.
To help users transfer data to a computer, Google Drive, Dropbox, OneDrive, Google Takeout allows users to export their data from Google Photos, Google Drive, YouTube, etc.
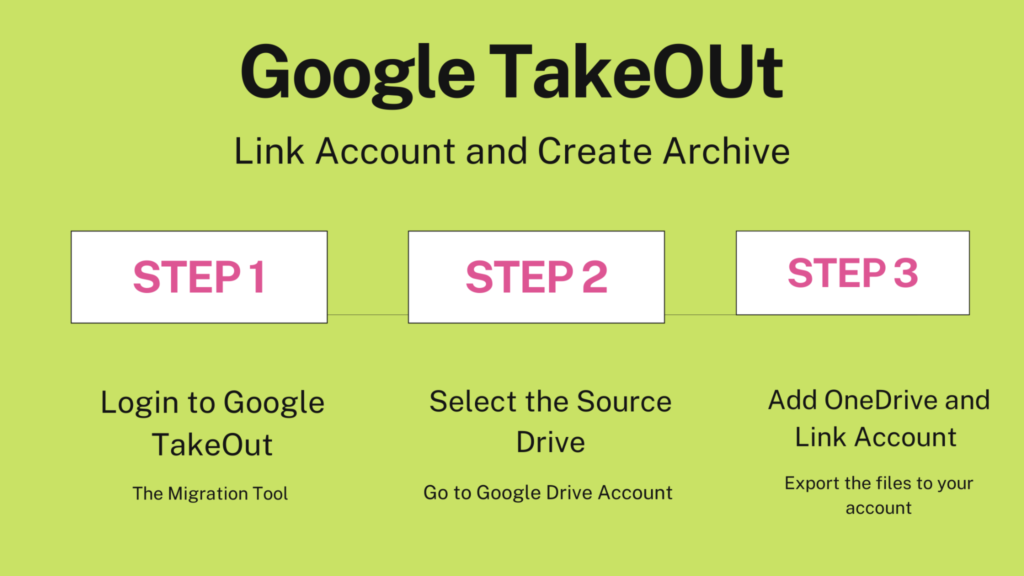
Syncing with Google Takeout
- Log in to Google Takeout.
- Click on “Next step” after you have chosen the source drive.
- Select the “Add to OneDrive” option and click the “Link Account and Create Archive” icon.
- From “Files,” you can access the exported data by logging into your OneDrive account.
You can use this method to avoid constant downloads and uploads, but you will need a high-speed internet connection. When the Internet is interrupted, the synchronization process must be restarted.
It is easiest to migrate using the tenant’s global admin account or to create an administrator account in Office 365.
It is easier to use a global administrator account. Tenants are created with a global admin account.
If you do not want to use this global admin account during migration, then a new user account can be created instead. This will then need to be granted full access rights to each user.
The admin account must have a full license assigned to it, in order to be able to provision OneDrive for Business profiles for each user during the migration process.
The error “Personal Site is not instantiated = PermissionsUserNotLicensed” indicates that the OneDrive collection for the user does not exist, and the administrator account used for migration does not possess a full license.
To resolve this issue, assign a license to the administrator account, and resubmit the migration.
A separate user account must be created for each user to be migrated.
For example, if you are migrating 100 users, then 100 additional users need to be created in Office 365.
Would you like to move files from Google Drive to OneDrive easily and quickly?
This article will tell you about the process of transferring files from Google Drive to OneDrive.
Create a new administrator account in Office 365 or use the tenant’s global admin account.
Grant full access rights to the account.
When the migration is complete, delete the old user account from Office 365 and replace it with a new user account created for each individual user.
If you do not want to use this global admin account during migration, then a new user account can be created instead
Migrating Google Drive To Onedrive – Step 1 And 2
There are a few different options when it comes to migrating data from Google Drive to Onedrive.
Some people choose to do the migration themselves. However, many companies have hired outside help to ensure the migration goes smoothly.
If you are interested in whether or not you should do a self-drive to Onedrive move, this article will provide some tips for you to consider.
The main issue with Onedrive is the file type.
It is commonly referred to as an email drive, web drive, or web archive drive.
These references generally describe the same physical storage medium.
Moving from 1GB of storage on your computer to 1TB of cloud-based storage is probably no more complex than moving your computer’s files onto OneDrive, the file sharing service that Microsoft offers online for free and syncs across all devices running Windows 10.
The SysTools G Drive to OneDrive Migration Tool
Especially if the two media sources are of quite different file formats.
For example, an individual may have an external hard drive containing pictures. On this drive, they can store all their files for photos.
However, the Onedrive platform doesn’t support viewing these files directly. Instead, they are saved onto a web folder on the cloud.
In the meantime, the user will have to connect the files to their browser in order to be able to view them.
Fortunately, there are several things you can do in order to shorten the process and make the migration to Onedrive a much easier task.
Step 1: Optimize the Google Drive files
The first thing to do is to optimize your files. This optimization will ensure your files are properly aligned so that Onedrive will be able to read them.
To help with the optimization of your files, you should create a new folder structure and then store all your files there.
After the optimization has been completed, it’s time to upgrade your Drive and sync everything again. This is the final step in the process.
Once all of your accounts have been upgraded, your next step is to close any other accounts you are currently working on.
There are some final steps to complete before you can migrate files to Onedrive. At this point, you should have an account open on the Onedrive service and a Google drive account.
In the bottom right corner of the main menu, you will see a button that says ” Migration complete.”
If your files are successfully migrated, the next step is to close all other programs. This will ensure that Onedrive will not be impacted by any changes you make to other accounts.
Step 2: Transfer all files to OneDrive
Then, you should click “start migration” to begin the transfer of your files. This will update your files and folders, which will help your data migrate from Drive, to Onedrive.
It’s easy to complete this process. All you need to do is open a new document, copy files to the new folder, then paste that folder into the previous document. Be sure to save all your files as text files.
Finally, close all other programs. These are the steps to take when you want to migrate Google drive documents to Onedrive.
The first thing to do is change the type of document you upload. It is recommended that you upload videos.
However, if you’re unsure whether it would be better to upload documents, you can always upload pictures first.
This will help you make up your mind whether or not you should continue the drive account process or start over with another program.
The next step is to close all programs and remove all items from your hard drive. You’ll also want to delete any USB drives that are connected to your computer.
This is one of the most important steps in the migration process because items in your hard drive could crash Onedrive, resulting in you losing everything on your computer.
Summary
You should disconnect the hard drive and then reboot your computer. This step cannot be overlooked.
The next step is to open a file manager and locate all of your saved files. You will need to drag the files that you want to transfer from Onedrive to your computer’s desktop.
It may take some time to transfer all of your files, so be patient. Once you’ve successfully moved all of your files, you’ll want to close the file manager and then repeat the last step.
The last step in the second step to migrate Google Drive to Onedrive is to click on the “Create Document” link.
This will start the second step of the second method to migrate your files. When the process is completed, your Google Drive documents will appear on your desktop or laptop as if they were simply uploaded to the internet.
Your files will be synchronized between your Onedrive and Google Docs folders.

Various aspects, such as bandwidth usage and provider agreements, determine the price of IP transit. Scalable pricing schemes are required to meet the requirements of companies. Standard pricing schemes include burstable, usage-based and flat-rate billing. Flat-rate pricing is appropriate for business houses with many customers because it provides uniform spending. Burstable billing provides you with flexibility in the event of an unforeseen traffic spike. Usage-based billing is billed on the volume of data that is used. Network performance and expense are influenced by service level agreements (SLAs). More dependable transit businesses are more expensive for uptime guarantees. Depending on the volume of data, some providers provide tiered pricing. Peering arrangements and traffic routing influence prices as well. Wholesale customers get discounts for big bandwidth commitments. Pricing transparency is required for firms to effectively manage network costs. To ensure stability, minimum bandwidth commitments can be incorporated in contracts. Firms can reduce costs by having a proper understanding of various models. A well-structured contract avoids surprise outlays. A pricing model needs to be chosen after a firm has examined its needs.
How IP Transit Pricing Adapts to Growing Business Bandwidth Needs
Scalable network solutions are required by businesses as bandwidth requirements increase. IP transit pricing need to factor in changing traffic patterns. Flexible plans are offered by providers to suit businesses with growing requirements. Bandwidth-intensive applications need more data transfer. Cloud computing and remote working use more bandwidth. Scalable pricing allows efficient cost control for businesses. Burstable billing is offered by some providers for short bursts. Flat rates are most appropriate for firms with steady traffic. Global organizations require high-bandwidth transit solutions. Periodic data exchanges conserve through payer contracts. Lower expenses are achieved through larger bandwidth commitments. Tiered approaches allow companies to choose the right plans. Providers look to identify usage patterns in order to design best-in-class solutions. Organizations can weather traffic spikes with scaling. Dynamic pricing models scale dynamically to regular demand. Future bandwidth growth is being supported by an experienced transit provider.
The Connection Between IP Transit Pricing and Network Redundancy
Redundancy in the network is necessary to ensure dependability and uptime. The IP transit pricing allows for the price of redundant infrastructure. Duplicate links are necessary to avoid outages for companies. Redundant routes increase network failure resistance. Several transit providers add to the reliability of the connections. Transit cost rises with increased redundancy levels. Failover functionality is included in the price of some providers. Companies that have critical applications invest in premium-level redundancy. Geographic diversification makes it less likely to fail locally. Redundant links minimize the interruptions caused by fibre cuts. Load balancing keeps traffic evenly distributed across multiple links. Peering agreements provide backup data paths for stability. Dedicated failover bandwidth is a standard part of pricing packages. Companies trade off redundancy investment against the cost of downtime. Mission-critical services require high availability solutions within the network. Disaster recovery plans will impact buying transit. SLAs establish recompense mechanisms for service down time. Up time is most important when negotiating a transit contract for companies. Good redundancy planning will balance cost against reliability.
Why IP Transit Pricing Varies by Region and ProviderGeographical position has an influence on the IP transit pricing. The cost of data transmission is influenced by regional infrastructure. Transit is cheap where the networks are large. Rural areas have the cost higher due to inefficient infrastructure. Global data routes influence price variations. Transit prices from different countries are determined by regulatory policies. Prices are competitive with the providers that have huge peering agreements. Transit costs are cheaper in competition-intensive markets. Prices are more expensive in monopoly-controlled networks. Regional pricing schemes are influenced by the locations of data centres. Cross-border links increase the expense of transit. Tiered pricing models are provided by providers in high-demand markets. Bandwidth cost and availability are determined by government policies. Transit is more expensive in developing markets due to infrastructure investments. The effectiveness of transit pricing is also influenced by access points of exchange. Certain localities offer subsidization to mitigate the expense of internet service. Transit cost maximization is supplemented by knowledge about these elements.
Twitter remains one of the most influential social media platforms for individuals, businesses, and brands. With its real-time nature, the platform provides an unparalleled opportunity to connect with audiences, share ideas, and build brand presence. However, with millions of tweets being posted daily, tracking engagement and analyzing performance can be challenging. This is where TWstalker comes into play. TWstalker is a powerful tool that enables users to monitor Twitter activity, analyze engagement metrics, and gain insights into trending topics.
Understanding TWstalker
TWstalker is an advanced Twitter analytics tool designed to track and analyze Twitter profiles and engagement. It helps users keep an eye on their own activity and competitors’ performances, making it an essential resource for social media managers, digital marketers, and influencers. By leveraging TWstalker, users can monitor their growth, identify trending content, and optimize their Twitter strategies.
Key Features of TWstalker
- Profile Monitoring – TWstalker enables users to track any public Twitter profile. It provides a detailed overview of followers, tweet history, and engagement rates.
- Engagement Analysis – The tool examines likes, retweets, comments, and other interactions to determine which content performs best.
- Trending Topics and Hashtag Tracking – Users can identify trending hashtags and topics relevant to their niche, helping them tailor content for maximum engagement.
- Competitor Analysis – TWstalker allows users to monitor competitors’ Twitter activities, helping them understand industry trends and effective engagement tactics.
- Real-Time Updates – The platform provides real-time insights into Twitter activity, allowing users to adjust their strategies instantly.
- Follower Insights – Users can gain a deeper understanding of their audience by analyzing demographics, interests, and engagement behavior.
- Sentiment Analysis – TWstalker can gauge public sentiment around tweets, brands, or topics, helping businesses refine their messaging strategies.
- Historical Data Access – The tool offers historical engagement data, allowing users to analyze trends and measure long-term performance.
How TWstalker Enhances Twitter Engagement
1. Helps Identify High-Performing Content With TWstalker, users can analyze which tweets receive the highest engagement. By studying successful tweets, users can identify patterns such as content type, tone, hashtags, and posting times that work best.
2. Assists in Competitor Benchmarking Understanding competitors’ Twitter strategies provides valuable insights into industry trends. TWstalker allows users to compare engagement metrics with competitors, revealing what works and what doesn’t in their niche.
3. Improves Hashtag Strategy Hashtags play a crucial role in Twitter engagement. TWstalker helps users track trending hashtags and analyze their impact, ensuring they use the most effective tags to maximize reach and engagement.
4. Strengthens Audience Understanding Knowing your audience is essential for engagement. TWstalker provides demographic insights, such as location, interests, and engagement behavior, helping users tailor their content to resonate with their followers.
5. Optimizes Posting Schedule Timing is everything on Twitter. TWstalker analyzes engagement patterns to determine the best times to post, ensuring tweets receive maximum visibility and interaction.
6. Enables Real-Time Engagement Adjustments With real-time tracking, users can quickly respond to trends, engage with audiences at peak times, and make instant changes to their content strategy.
TWstalker for Businesses and Influencers
Businesses and influencers can leverage TWstalker to maximize their Twitter marketing strategies. Here’s how:
For Businesses:
- Monitor brand mentions and customer feedback.
- Track competitor campaigns and engagement levels.
- Analyze customer sentiment and tailor marketing messages accordingly.
- Identify brand advocates and potential influencers for collaborations.
For Influencers:
- Understand audience preferences and tailor content for higher engagement.
- Identify collaboration opportunities by tracking industry trends.
- Measure the effectiveness of different types of tweets.
- Engage effectively with followers based on data-driven insights.
Best Practices for Using TWstalker
- Set Clear Goals – Whether tracking competitor activity or increasing engagement, having clear objectives will help maximize TWstalker’s benefits.
- Monitor Consistently – Regular analysis allows users to stay updated on trends and make timely adjustments.
- Engage Actively – Data is valuable only when acted upon. Users should interact with followers, reply to comments, and share relevant content.
- Analyze Sentiment Trends – Understanding audience sentiment helps in crafting the right messages and avoiding potential PR issues.
- Leverage Historical Data – Looking at past engagement trends helps in long-term strategy planning.
Future of TWstalker and Twitter Analytics
With the growing importance of data-driven marketing, Twitter analytics tools like TWstalker will continue to evolve. Features like AI-driven predictive analytics, deeper sentiment analysis, and enhanced automation are expected to become integral to such platforms.
Businesses and individuals who invest in Twitter analytics will gain a competitive advantage by making informed decisions based on real-time data. Whether it’s optimizing tweets, engaging with followers, or tracking brand performance, tools like TWstalker will remain invaluable in maximizing Twitter’s potential.
Final Thoughts
TWstalker is an essential tool for anyone looking to maximize their Twitter engagement. By tracking key metrics, analyzing competitor strategies, and identifying trends, users can refine their approach and achieve better results on the platform. As social media continues to evolve, leveraging analytics tools will be critical for maintaining a strong online presence. Whether you’re a business, influencer, or casual Twitter user, TWstalker provides the insights needed to optimize engagement and make the most of Twitter’s vast opportunities.
Managing PDFs efficiently is essential for professionals, students, and businesses that rely on document workflows. Sejda is a powerful PDF management tool that provides a wide range of features to edit, convert, merge, and secure PDFs. Whether you are handling reports, contracts, or academic papers, Sejda simplifies the process with its user-friendly interface and cloud-based accessibility. In this guide, we explore the features of Sejda and provide expert tips to maximize its capabilities.
Understanding Sejda: An Overview
Sejda is an online and desktop PDF tool designed to help users manage their PDF files efficiently. Unlike many other PDF editors, Sejda offers a clean and intuitive interface, making it accessible even for beginners. With a strong focus on privacy, Sejda ensures that uploaded files are automatically deleted after processing, which is particularly useful for handling sensitive documents.
The platform supports a variety of operations, including merging, splitting, compressing, editing, and converting PDFs. It is available in both a free and paid version, with premium features tailored for advanced users and businesses. Sejda is compatible with Windows, Mac, and Linux, making it a versatile solution for different operating systems.
Key Features of Sejda
- PDF Editing
- Modify text and images directly within a PDF
- Add annotations, highlights, and comments
- Insert or remove pages from a document
- Whiteout text and redact sensitive information
- PDF Conversion
- Convert PDF to Word, Excel, PowerPoint, and other formats
- Transform images (JPG, PNG) into PDFs
- Convert scanned PDFs into editable text using OCR (Optical Character Recognition)
- Merging and Splitting PDFs
- Combine multiple PDFs into a single document
- Split a PDF into separate files based on pages or bookmarks
- Extract specific pages from a PDF
- Compressing PDFs
- Reduce file size while maintaining quality
- Choose different compression levels for optimization
- Compress images within a PDF to minimize storage requirements
- Security and Encryption
- Add password protection to sensitive documents
- Encrypt PDFs to restrict unauthorized access
- Digitally sign documents for authentication
- Batch Processing
- Perform bulk actions on multiple files at once
- Merge, split, or compress multiple PDFs in one go
- Automate repetitive tasks to save time
- Forms and Annotations
- Fill out and sign PDF forms electronically
- Add checkboxes, dropdowns, and text fields
- Highlight important sections for review
- Cloud Integration
- Import and export files from Google Drive, Dropbox, and OneDrive
- Work on PDFs directly from the cloud
- Sync edits across multiple devices seamlessly
Tips for Maximizing Sejda’s Potential
- Use Keyboard Shortcuts for Faster Editing Sejda supports various keyboard shortcuts to speed up the editing process. Learning these shortcuts can improve efficiency, especially when handling large documents.
- Optimize File Size for Easy Sharing If you need to send PDFs via email or upload them online, use the compression feature to reduce the file size without compromising quality.
- Leverage OCR for Scanned Documents When working with scanned documents, enable the OCR feature to convert images into searchable and editable text, making it easier to extract information.
- Automate Tasks with Batch Processing Save time by processing multiple files at once. This is particularly useful for businesses handling contracts, invoices, or large reports.
- Secure Sensitive Information Before sharing confidential PDFs, use the password protection and encryption features to prevent unauthorized access.
- Utilize Cloud Storage for Accessibility By linking Sejda with cloud storage services, you can access and edit your PDFs from anywhere, ensuring seamless collaboration and document management.
- Edit PDFs Without Downloading Software If you need quick edits, use Sejda’s web-based platform instead of downloading the desktop version. This is ideal for users who work on multiple devices.
- Customize PDF Merging Options When merging files, arrange them in the desired order and remove unnecessary pages before finalizing the document.
- Experiment with Different Output Formats If your document needs reformatting, test different conversion options to find the best output format that suits your needs.
- Take Advantage of the Free Version for Basic Needs Sejda’s free version offers essential features that can handle simple PDF tasks without requiring a subscription. Use it for occasional edits before considering a premium plan.
Why Choose Sejda Over Other PDF Tools?
- Affordable Pricing
- Sejda offers competitive pricing compared to Adobe Acrobat and other premium PDF editors.
- Flexible plans include daily, monthly, and yearly options.
- Privacy-Focused
- Automatically deletes uploaded files after a few hours.
- No risk of permanent cloud storage without user consent.
- User-Friendly Interface
- Designed for both beginners and professionals.
- Simple navigation and well-organized tools.
- Cross-Platform Compatibility
- Available on Windows, Mac, Linux, and web browsers.
- Works seamlessly across different devices.
- No Installation Required for Online Use
- Edit and manage PDFs directly in a web browser.
- Eliminates the need for software downloads.
Final Thoughts
Sejda is an excellent PDF management tool for individuals and businesses looking for an efficient, affordable, and secure way to handle documents. With its extensive features, including editing, conversion, security, and batch processing, Sejda streamlines document workflows while ensuring ease of use. By leveraging the tips mentioned above, users can maximize Sejda’s potential and enhance their productivity when dealing with PDFs.

 Business5 years ago
Find out how useful a loan is without a credit check
- Digital Marketing5 years ago
Is YouTube Marketing Capable of Taking Your Business to the Next Level?
- Food5 years ago
5 Best and Worst Foods for Boosting Metabolism
- Business4 years ago
Content Creation Tips Every Digital Manager Needs to Know
- Business4 years ago
Best Workplace Upgrade
- Lifestyle4 years ago
How to Choose the Best Air Fryer for Me
 Fashion4 years ago
8 Top Leather Jacket Picks To Try Out This Year
- Tech5 years ago
Food Lion Employee Login at ws4.delhaize.com – MyHR4U