
Home Improvement
A detailed guide to EPDM rubber roof
EPDM roofing offers a cost-effective way to your roofing needs. Because they can last quite long, you can expect the roofing material to withstand the weather elements for at least fifty years. This is because this material has both polypropylene and ethylene qualities. The good thing is that they are easy and quick to install. The material also provides a durable surface that needs little maintenance during its lifetime.
Remember that you need to install EPDM edge trims to seal and even protect the flat roofing from water ingress. The good news is that you can find rubber roof trims from many roofing suppliers. Also, a built-in kerb can trap roofing membrane and create an effective and reliable waterproof seal. This article is a detailed guide to EPDM rubber roof.
Understanding the EPDM rubber roofing
Ethylene Polypropylene Diene Monomer (EPDM) is considered to be a versatile rubber options you can find on the market. Most people regard it as the best material when it comes to flat roofing. Rubber is also a popular option for commercial and industrial applications because it can withstand extreme weather conditions. Even better, it doesn’t need a lot of maintenance, and has great insulation properties and is tear-resistant. All these factors contribute to this material having a long lifespan.
With the increase in the popularity of EPDM roofing, traditional roofing materials like felt have now taken a backseat in this roofing market. EPDM is not just a strong material, but it’s also easy to work with. It gives an appealing finish. Remember that this roofing option requires you to hire a specialist to handle it.
It’s worth mentioning that the GRP roofing is also popular with many homeowners as it offers an attractive appearance. But the only catch is that you need a professional contractor to install it. Quite often, GRP roofing is also more expensive than EPDM.
The key benefit of EPDM is that it’s suitable for almost any roof type. Therefore, the overall cost can depend on various factors, such as the roof’s total surface area and the type of roof that needs EPDM covering. And, in most cases, the current roof covering may require to be replaced completely. On some projects, you can lay EPDM on top of the current material. Simply put, prices of EPDM can depend on the work needed.
As explained earlier, an EPDM rubber roof’s lifespan is usually over fifty years. This is over half a century of little maintenance as it has highly durable properties. This type of roofing needs to be guaranteed for a period of fifty years, but it’s common for most EPDM manufacturers to give a warranty of at least 25 to 30 years.
Installing EPDM roofing
The good thing about EPDM is that you can choose to fit it yourself. If you are good at DIY, then you don’t have to contact a specialist to do it on your behalf. You can fit EPDM by following some specific steps.
Before you decide to install EPDM, you need to ensure that the surface you want to lay it on is dust-free, clean, and dry. You should note that any moisture can affect the performance of your rubber roofing. Therefore, you must start with a clean and dry base.
If you want to fit a single piece EPDM roof, there are good chances that it may be glued in place. Hence, you should consider buying a new roof deck prior to installing the rubber roofing. It’s crucial to understand that bitumen tends to have a negative effect when it comes to the performance of EPDM rubber membranes. Therefore, you need to remove any residue before the installation process.
It can be refreshing to fully remove your roof and begin from scratch, but there are some situations that this solution may not be viable. If you want to over board, then the timber decking and roof structure need to be in great condition. You should inspect these to determine whether or not over-boarding can work.
A flat roof usually requires complete stripping. And, it’s quite common for the chipboard to fall off after it’s exposed to the weather elements. This can leave you with a base that may be hard to work with.
You can achieve the best appearance for your roof when you spend time preparing the surface of the roof and relaxing the EPDM membrane. Remember that allocating time to this process is a crucial step in making sure that you get a quality finish.
Also, the roof surface needs to be 100 percent clean because any dust particles can be visible below the membrane. Worse still, the dust particles can prevent the glue from bonding. As a result, you may not get an aesthetically pleasing outcome with some bumps below the membrane. You can reduce this problem by brushing the roof’s surface at least twice.
Before you place the membrane, you should give it time so that EPDM membranes can relax. This lets it expand and contract to retain its neutral state. You should remember that you need to unfold the material carefully to make sure that it doesn’t get dirty. It also allows it to relax in place for at least twenty to thirty minutes. It’s worth mentioning that this is an important step because failure to give it enough relaxing time can lead to having a wrinkled surface that allows water to pond in the future.
Lastly, the key steps involved in fitting EPDM roofing include gluing and trimming of the rubber roof membrane. You should start this process when the membrane has had enough time to relax. In other words, the membrane should have its neutral state to start this process.
In conclusion, EPDM rubber roofing has become a popular way you can improve the appearance of your roof. The good thing is that you can decide to install it yourself as it’s easy to work with. But if you cannot install it yourself, then you need to hire a professional contractor with experience in handling EPDM rubber roofing to do it on your behalf.
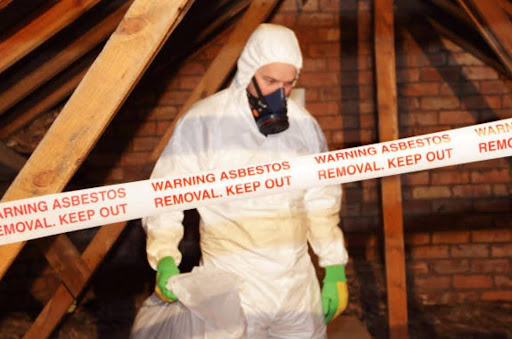
It’s an unfortunate fact that many Sydney home renovators forget about asbestos. After all, it doesn’t make the headlines like it did before its banning in 2003, but that doesn’t mean it doesn’t still lurk in your walls, floors and ceilings. This is because any home that was built before the late-1980s likely contains this deadly mineral that home renovating can easily irritate.
Unfortunately, once this mineral is irritated it has the ability to permeate through the air and enter our lungs, potentially causing a range of serious health problems like asbestosis, lung cancer and mesothelioma.
With this in mind, home renovators undertaking any work on a home built before the late-1980s should be fully asbestos aware and undergo the proper training to ensure this.
Here are five reasons why the most comprehensive asbestos awareness training Sydney has will be of great benefit to you and your health:
- You will be able to spot any risks
You are undertaking some awesome renovations and this is an exciting time for you as a homeowner. Unfortunately, your home’s current materials may contain this nasty and toxic substance. It can be found in various home materials, including:
- Wall insulation
- Floor tiles
- Ceiling tiles
- Roofing
- Siding
- Textured paints
And more. You will gain a much better understanding of where the mineral can be found in your home and this will help you to avoid going to work on any danger areas before professionals can properly remove it.
- It can prevent you from unwanted exposure
Knowing where the mineral will likely be located within your home can save you from agitating it during the renovation process. Because, the last thing you want when undertaking an exciting process like renovations is to agitate the mineral and have it floating around your work area – seriously.
Sure, this nasty mineral might not receive the same attention as it did years ago, but it is still found within thousands of Aussie homes. Therefore, it’s best to know where it can be located to avoid a potential exposure during the renovation process.
- It will provide you with greater peace of mind
Sure, you are probably eager to get started on your home renovation, and this likely includes knocking down a wall or two. Unfortunately, if you are aware of the substance and its potential threat to you and your family’s health then you probably aren’t too relaxed about getting started.
Thankfully, undergoing proper awareness training is the best way to ensure that you have the peace of mind that you can locate and have asbestos properly removed before you start work. Otherwise, you might find yourself knocking down walls without the comfort of knowing whether it is or is not located within them.
- You can ensure it is safely removed
It is really never recommended that home DIYers attempt to remove the mineral themselves. However, having the ability to locate and identify its presence ensures that you can call the experts to have it safely removed. They will obviously be more than happy to come out to your property and remove its presence so that you can safely continue your stunning new renovation!
- You will protect everyone around you
We get it: renovations are expensive. However, you can’t put a price on the health of you and your loved ones. Therefore, spending a little extra to be fully aware of the substance is one of the best things you can do regarding the health and safety of you and your loved ones as you work towards a beautiful new home aesthetic.
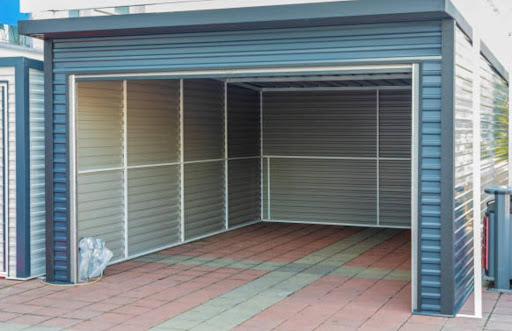
Carports for sale are useful and reasonably priced ways to shield cars from inclement weather and environmental harm. Without the hassles of building a permanent garage these adaptable shelters improve outdoor areas and offer shade and shelter. They fit different vehicle kinds and property needs and come in a variety of sizes and styles.
For individualised carports, purchasers can select materials, colours and extra features from a variety of vendor customisation options. These structures provide durability with little maintenance because they are strong and simple to maintain. For increased longevity buyers can choose carports composed of premium wood, metal or composite materials. Purchasing a carport is an affordable method to protect automobiles and provide outdoor areas more useful value. Look through the alternatives to locate the ideal carport.
Portable Carports for Sale: Flexibility and Convenience in One
For a variety of outdoor shelter requirements and vehicle protection, portable carports for sale provide an adaptable option. These movable buildings are made to be readily put together, taken apart, and moved without expert help. Durable performance is guaranteed by their sturdy yet lightweight materials which also provide portability and flexibility. Cars, motorbikes and recreational vehicles are among the many vehicle types that can be accommodated by portable carports, which come in a variety of sizes and designs. For increased longevity several manufacturers provide versions with resistant to UV ray covers and strengthened frames.
These structures are usually easy to assemble with simple tools and straightforward installation instructions. Portable carports frequently do not require permits because they are temporary which greatly simplifies the setup procedure. Especially when there are financial or spatial limitations, they are a great substitute for permanent garages. Before choosing an appropriate model buyers should take into account elements like size, material quality and frame strength. For use in commercial, residential and recreational settings portable carports offer the ideal mix of protection and adaptability. For increased utility several models come with programmable features like doors, dividers and ventilation systems. Their weather resistant materials shield cars and possessions from inclement weather including wind, rain and sun. Movable carports are a wise investment for long term use because they require no upkeep.
Customize Carports Tailoring Designs to Match Your Style
Carport customisation enables homeowners to create designs that combine practicality with their own personal style. Customised carports provide more options for materials, sizes, colours and structural improvements than regular ones. This customisation guarantees that the carport will not only shield cars but also blend in with the building architectural design. For improved weather protection, homeowners can select from a variety of roof styles including as gabled, flat and A frame designs. Continuous durability and low maintenance requirements are ensured by choosing premium materials like wood or galvanised steel. Extra elements like side panels, storage areas and enclosed walls improve adaptability and usefulness. Carports may be made to match the external colour scheme and design components of the property with ease thanks to colour customisation choices.
Numerous producers provide powder coated finishes with increased lifespan that are resistant to fading and chipping. Trim accents and unique roofing patterns are examples of decorative embellishments that enhance the carport aesthetic appeal. Customers can collaborate with manufacturers to make sure their carport complies with regional zoning and building laws. By combining practicality, design and individual preferences investing in a custom carport offers substantial value. For better protection of stored vehicles and possessions security elements like lockable doors and reinforced frames are used. Size parameters are another area where customisation is possible easily fitting larger recreational equipment or many cars. A carport that successfully satisfies present and future needs is guaranteed by careful planning and design decisions. Electrical outlets and lighting options can be combined to provide extra convenience for tasks requiring power or at night. Carports for sale used for outdoor work or enjoyment are more comfortable when equipped with insulation and ventilation systems.
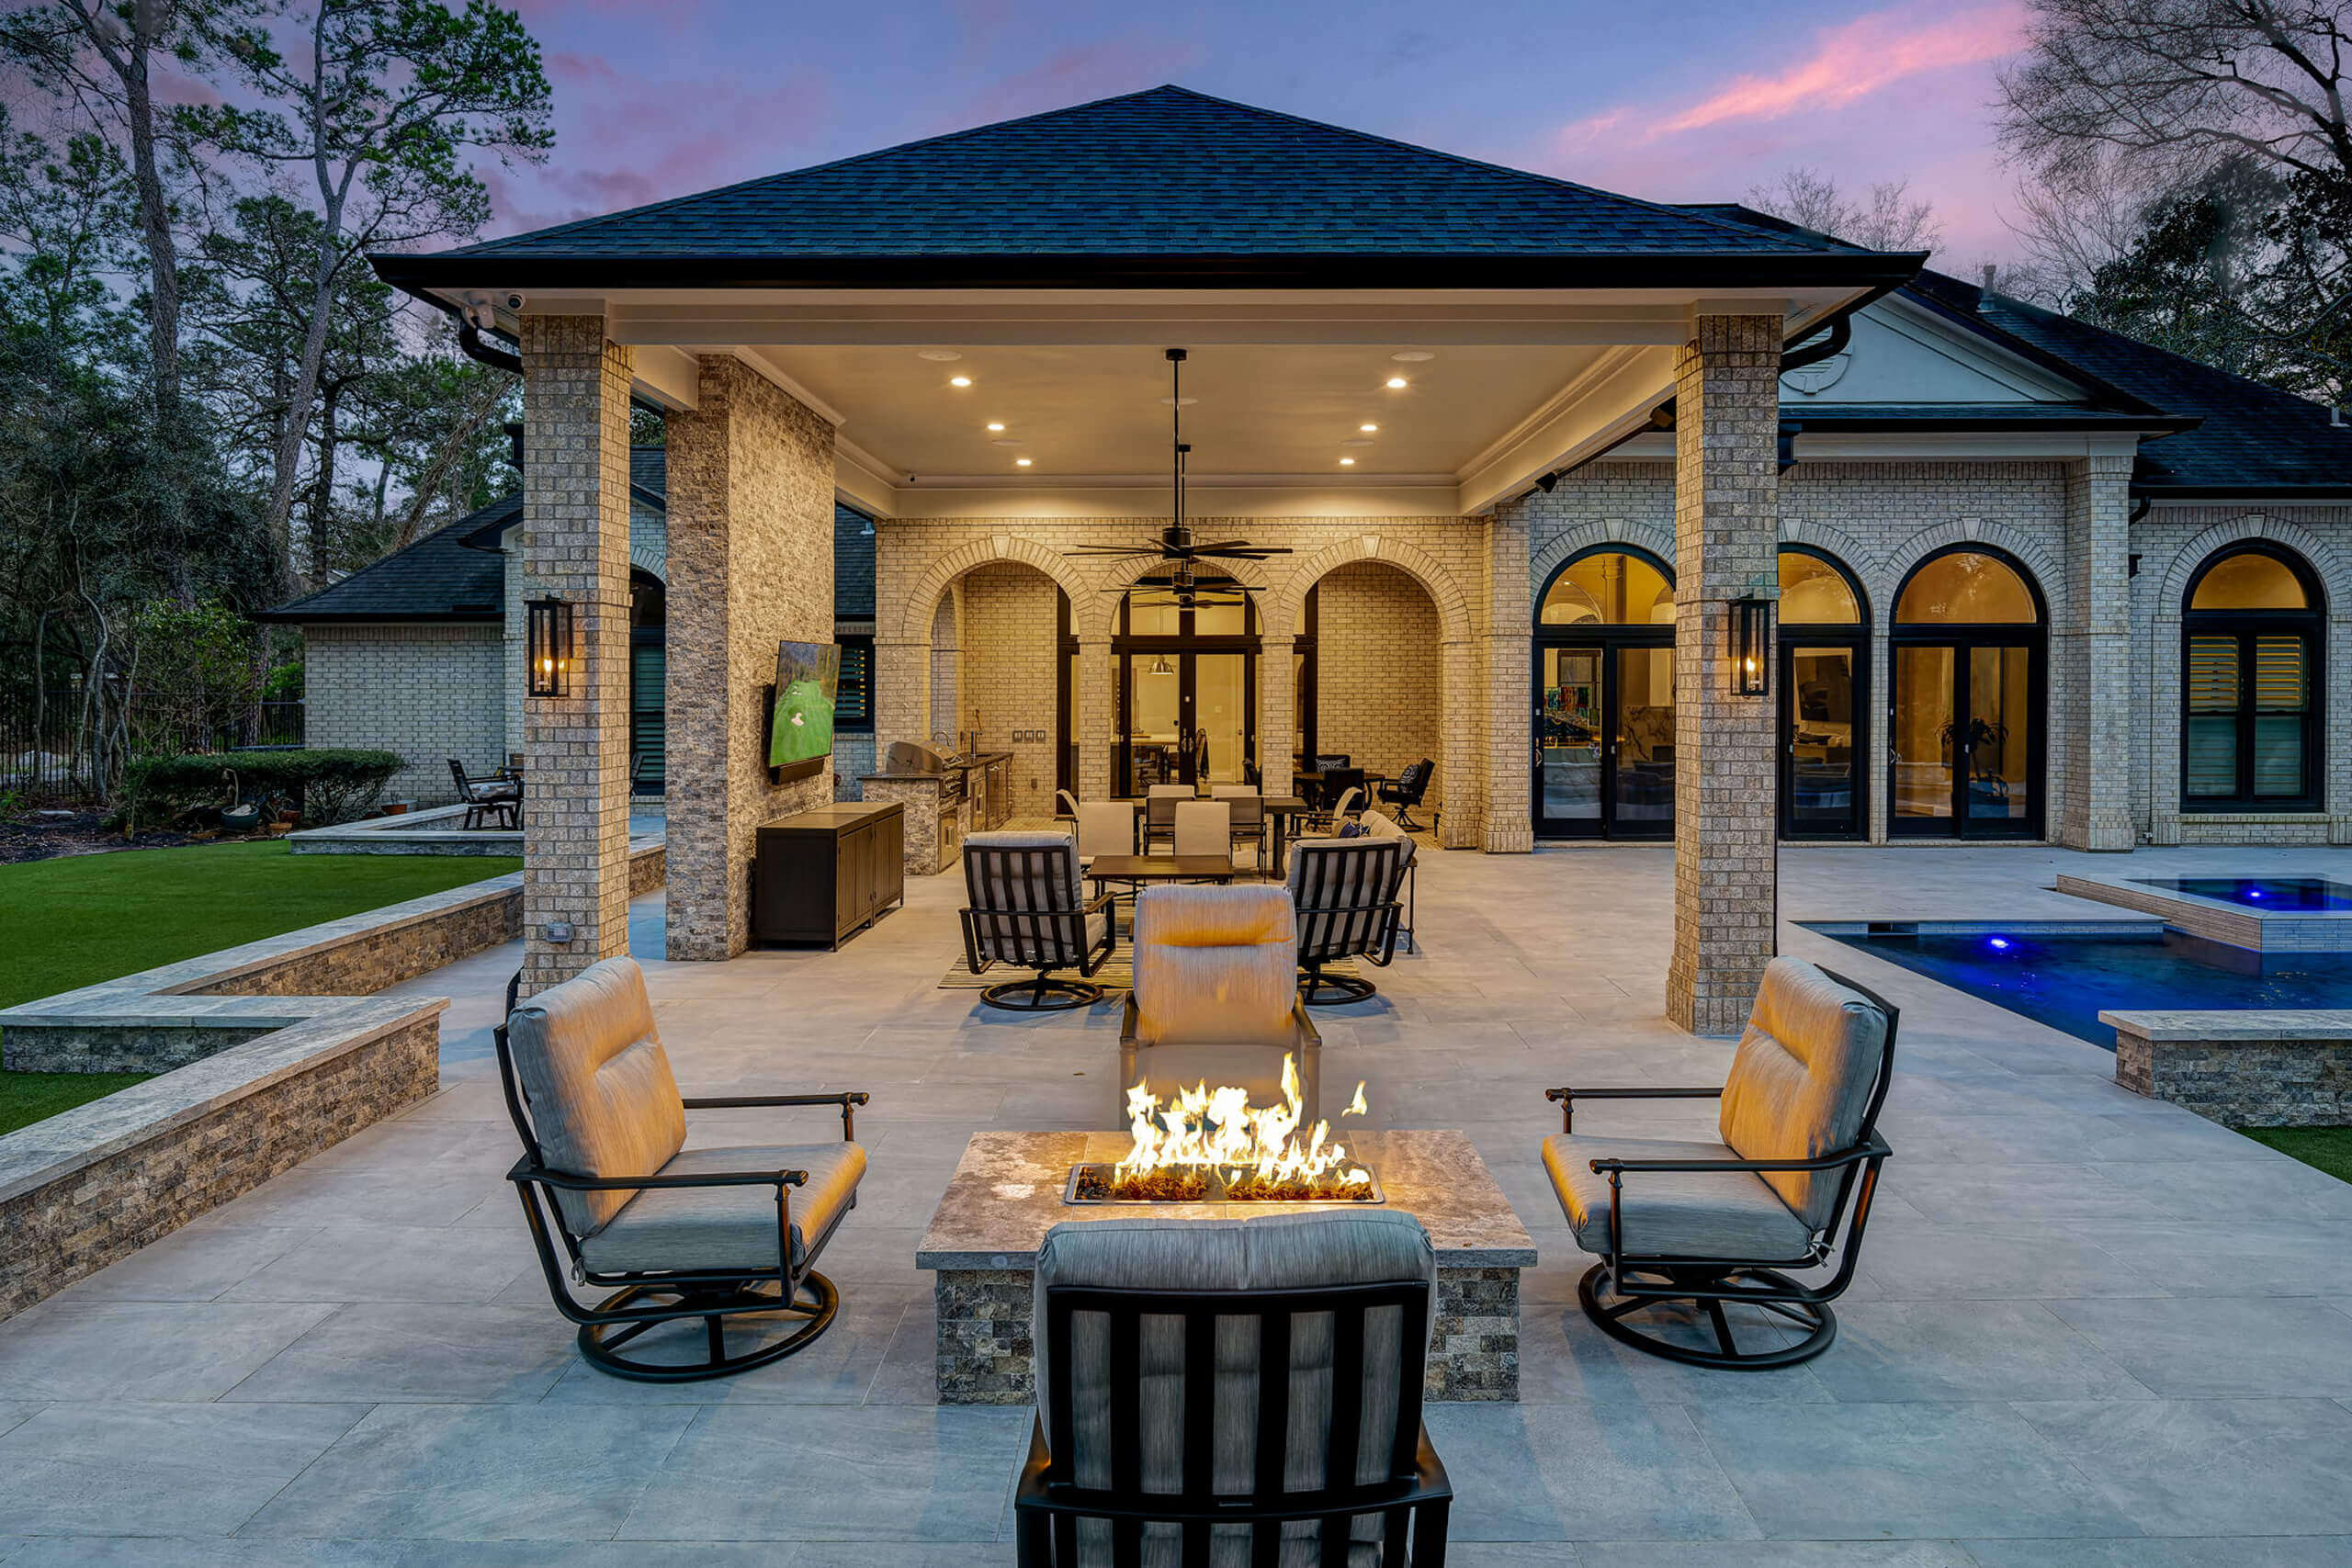
Have you ever envisioned transforming your backyard into a cozy haven where you can unwind, entertain guests, and bask in the beauty of nature? Creating a stunning outdoor living space allows you to do just that. Whether you have a sprawling garden or a small urban patio, there are countless ways to elevate your outdoor area. In this article, we’ll explore some creative ideas for a beautiful backyard.
What is an Ideal Outdoor Living Space
One of the first steps to creating a stunning outdoor living space is to define its purpose. Do you want a serene retreat for personal relaxation, a space for entertaining, or a combination of both? The design of your outdoor space will largely depend on your intended use. If you’re seeking tranquility, consider incorporating a water feature like a fountain or pond, reminiscent of the soothing ambiance found in picture of Joyce Meyers House. It can provide soothing sounds and a sense of serenity. On the other hand, if you love hosting gatherings, an outdoor kitchen and a well-furnished dining area might be the way to go.
To create a seamless transition between your indoor and outdoor spaces, consider installing large sliding glass doors. This will not only connect the two spaces but also allow for plenty of natural light to flow inside. Complement this with comfortable outdoor furniture, creating a welcoming atmosphere. Soft, warm-toned lights along pathways and around seating areas can create a cozy atmosphere reminiscent of the settings often discussed in roofing blogs.
Added Inclusions to Elevate Your Outdoor Space
Next, think about how you can add an element of greenery to your backyard. A well-designed garden can be a feast for the eyes and a balm for the soul. You can even create a small vegetable garden, giving you access to fresh produce and a sense of accomplishment. Incorporate hardscaping elements like pathways, pergolas, or trellises to add structure and visual interest to your garden.
Lighting is a crucial aspect of outdoor living spaces. The right lighting can extend the usability of your backyard into the evening hours and create a magical ambiance. Consider installing soft, warm-toned lights along pathways and around seating areas. String lights or lanterns can add a touch of whimsy and create a romantic atmosphere.
Fire features are another fantastic addition to your outdoor space. A fire pit or outdoor fireplace not only provides warmth during cooler nights but also serves as a focal point for gatherings. Imagine roasting marshmallows, sharing stories, and gazing at the stars by the fire.
Lastly, consider adding some personal touches to your outdoor living space. Decorate with your favorite artwork, sculptures, or decorative accents.
Conclusion
In the end, your outdoor living space should be an extension of your home, a place where you can escape the daily hustle and bustle, and immerse yourself in the natural beauty that surrounds you. So make sure you make the best out of your outdoor space. After all, a beautiful backyard is not just a space; it’s a canvas for your outdoor adventures and a sanctuary where you can make lasting memories.

 Business5 years ago
Find out how useful a loan is without a credit check
- Digital Marketing5 years ago
Is YouTube Marketing Capable of Taking Your Business to the Next Level?
- Food5 years ago
5 Best and Worst Foods for Boosting Metabolism
- Business5 years ago
Content Creation Tips Every Digital Manager Needs to Know
- Business4 years ago
Best Workplace Upgrade
- Lifestyle5 years ago
How to Choose the Best Air Fryer for Me
 Fashion5 years ago
8 Top Leather Jacket Picks To Try Out This Year
- Tech5 years ago
Food Lion Employee Login at ws4.delhaize.com – MyHR4U