Fashion
Trendiest, Most Flattering Medium Length Hairstyles to Try This Year
Medium hair style Baby lights on light brown hair
If you choose the finest and most amazing look Baby eyes on light brown hair are the amazing hairstyle for girls. This gently curly layered hairstyle really gives the look just the right freshness. The point to keep in mind in this particular hairstyle is that here the soft layers actually have tapered ends and are actually in the uneven and messy way to get the look. Highlights along with tan and caramel have been used in the images of some of the curl locks to accentuate the haircut an
Medium ash face with black hair
Do you have medium length hair style? Do you like to keep your hair a little messy and uneven? Second, this special medium ash brown highlight for black hair is perfect for you. This single-layer hairstyle with straight hair can look great on women along with slim skin.
Silver holographic hair
Girls with silver hair always go for the amazing and classy hairstyle to look absolutely best and therefore they must go for this holographic silver hair. If you have medium-length black hair, this hairstyle is a must to try. Here in this particular hairstyle, the layers start at the given length and then barely two layers can be shown instead of 3. With the silver, sky blue, and pink texture of the hair they also add a bit of volume and fun. , enhancing a girl’s beauty Pink and blue accents on black hair give the hairstyle a naturally beautiful look.
Jet black hair with burgundy highlights
The burgundy color is very fashionable for girls who have straight, long, or medium hair. Basically, this particular hairstyle allows girls to bravely stand between people. This Jet Black Hair with Burgundy Highlights hairstyle mixes the facelift, layered hairstyle with a hint of pony for a totally fresh look. The layers of this hair actually start at the chin and the front, which has a wispy pony. In this special case, the highlighting is also present on the top of the front pony to give a special touch to the overall image.
Rose gold highlights for medium hairstyles
Girls who like to experiment with their hair find amazing hair colors with Hairstyle Weekly. Although many colors are available, such as light brown, purple or blonde, choosing the right color for your skin tone is ideal for your personality. Rose gold hair color is very sweet for those who have fine and smooth hair. This rejuvenating hairstyle layer also comes with some small layers that really start just above the chin and continue through the entire length of the hair. This rose gold wavy hairstyle is the trendiest, which you can try with medium-length hair.

Blonde Copper Mahogany Blonde Highlights
Sometimes the messy and uneven cut looks absolutely gorgeous. If you try these dark shades of Dark Copper Mahogany Blonde, you can triumph in the crowd. This blown hairstyle can be perfect for girls and women along with fine medium-length hair. The layered cut can also apply the body to the hair and thus fit better on fine hair. Here the first layer of the hairstyle begins directly under the chin and the last volume of hair rests on the shoulders. The reddish look is very beautiful for the party look
Caramel ombre soft redhead
If someone chooses something absolutely great, choose the best hairstyle. Caramel Red Ombre Soft Medium Hairstyle is perfect. This hairstyle can give the hair a lush look, which can contribute to its overall look. The soft fringes on the front are swept to the sides, and an interesting application of bright color highlights centered on the front fringes gives this particular style a completely different look. The internal wavy pattern on the edge of the hair is another point to check. Hairstyles are also easy to manage.
Blue and pink highlights for light brown hair
The fashion world has a strong loyalty to blue. From dresses to shoes, makeup to hair, this particular hair color is absolutely gorgeous and gorgeous. If you are medium length, fine hair fits this particular hairstyle, and you will not regret it. This long blue hairstyle can give just the right look when combined with the right kind of highlights like blue. The uneven or messy little distribution of her hair highlights gave her a very natural look. So check out this highlighted pattern while brightening the colors.

Crocheting is a timeless craft that allows for creativity, relaxation, and skill development. Whether you are a beginner or an experienced crocheter, using free crochet patterns can be an excellent way to enhance your abilities. These patterns offer guidance, introduce new techniques, and help you refine your skills without any financial investment. In this article, we will explore how free crochet patterns contribute to skill improvement and why they are a valuable resource for every crochet enthusiast.
1. Learning the Basics with Free Crochet Patterns
For beginners, starting with simple patterns is essential. Free crochet patterns provide step-by-step instructions that help new crocheters understand fundamental techniques such as chain stitches, single crochet, and slip stitches. Many beginner-friendly patterns also include illustrations or video tutorials, making it easier to grasp essential concepts.
By following structured patterns, beginners can gradually build confidence and progress to more intricate designs. Free resources eliminate the pressure of purchasing patterns, allowing learners to practice without financial commitment.
2. Exploring Different Stitch Techniques
One of the most effective ways to enhance your crocheting skills is by learning different stitch techniques. Free crochet patterns introduce various stitches, from basic to advanced, helping crocheters expand their knowledge. Some commonly featured stitches include:
- Half-double crochet (HDC) – A versatile stitch used in many projects.
- Treble crochet (TR) – A taller stitch that creates a looser texture.
- Shell stitch – A decorative stitch perfect for blankets and scarves.
- Cable stitch – Often found in intricate patterns for textured designs.
Experimenting with new stitches through free patterns allows crocheters to understand how different textures and densities affect their work, ultimately improving their overall technique.
3. Mastering Pattern Reading Skills
Reading and interpreting crochet patterns is an essential skill for any crocheter. Many beginners struggle with understanding abbreviations, stitch counts, and pattern layouts. Using free crochet patterns, crocheters can practice reading instructions and symbols without the fear of making costly mistakes.
As crocheters become more comfortable with pattern reading, they can confidently tackle more complex designs and even start modifying patterns to suit their preferences.
4. Enhancing Speed and Consistency
Crocheting efficiently requires practice and repetition. By working on a variety of free crochet patterns, crocheters can improve their speed while maintaining stitch consistency. Repeating patterns with similar stitches helps muscle memory develop, leading to smoother and more uniform work.
Additionally, free patterns encourage crocheters to try different projects—such as hats, scarves, and amigurumi—which involve varying levels of speed and precision. This practice ultimately leads to better control and dexterity.
5. Encouraging Creativity and Customization
One of the best aspects of using free crochet patterns is the opportunity for creativity. As crocheters gain confidence, they can start modifying patterns by adjusting stitch counts, changing colors, or incorporating new textures. This customization allows for unique, personalized creations while refining technical skills.
Many free patterns also serve as inspiration for original designs. Once crocheters understand how patterns are structured, they can experiment with their own ideas and create one-of-a-kind pieces.
6. Practicing with Different Yarn Types
Each type of yarn behaves differently, and understanding how various yarns affect a pattern is crucial for skill development. Free crochet patterns often recommend specific yarns, but crocheters can experiment with alternatives to see how different fibers and weights impact the final product.
For instance, working with cotton yarn for dishcloths, wool for winter accessories, or acrylic for blankets helps crocheters gain experience with different textures, drape qualities, and durability factors. This knowledge becomes invaluable when selecting yarn for future projects.
7. Building a Crochet Routine with Structured Projects
Consistency is key when it comes to improving crochet skills. Free crochet patterns provide structured projects that encourage regular practice. Whether crocheters dedicate time each day or set weekly goals, working through patterns ensures continuous learning and refinement of skills.
Having access to an extensive library of free patterns also means crocheters can always find something new to work on, preventing stagnation and keeping the craft engaging.
8. Joining Crochet Communities for Support and Learning
The availability of free crochet patterns has led to the growth of online crochet communities. Platforms such as Ravelry, Pinterest, and Facebook groups offer a space where crocheters can share patterns, seek advice, and showcase their work.
Engaging with these communities provides additional learning opportunities, as experienced crocheters often share tips, troubleshooting advice, and modifications to existing patterns. Being part of a crochet community also helps maintain motivation and encourages collaboration.
9. Gaining Confidence to Take on Advanced Projects
As crocheters progress through different free crochet patterns, they build the confidence needed to take on more advanced projects. What once seemed intimidating—such as intricate lacework, detailed amigurumi, or complex garments—becomes achievable with practice and persistence.
By starting with simpler patterns and gradually working through more challenging ones, crocheters can develop a strong foundation that prepares them for ambitious creations.
Conclusion
Utilizing free crochet patterns is an excellent way to improve crocheting skills without financial constraints. These patterns help beginners learn the basics, introduce new stitch techniques, enhance speed and consistency, and encourage creativity. They also provide structured practice, support from online communities, and the confidence to take on advanced projects.
Whether you are just starting out or looking to refine your craft, incorporating free crochet patterns into your routine is a smart and effective way to grow as a crocheter. With endless patterns available, there is always something new to learn and create.
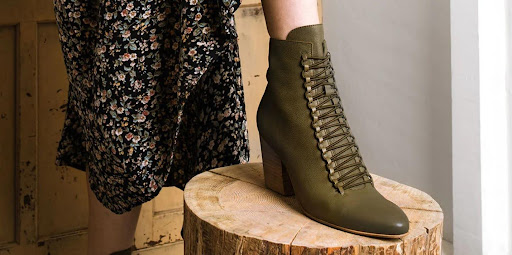
For people who love style and quality, Django & Juliette shoes are really popular. The boots come in unique styles, comfort, and pay attention to details. Even though they can be sometimes pricier, season sales offer the perfect time to spend the cash for investment. Many designs are hugely discounted during these sales. So, you invest in Django & Juliette boots, and you will never go wrong with classic, durable footwear that can always dress you up with perfect balancing acts between fashionable style and craftsmanship.
Styling Django and Juliette Boots: How to Pair Footwear with Any Outfit
Mainly, why do people like their Django & Juliette boots so much? They are so versatile that they easily go with almost everything a woman has in her wardrobe. Teamed with slim jeans and a simple blouse, they look effortless to stroll about in the office. Try teaming them with a fitted dress or skirt for a put-together look. Django and Juliette boots sale have patterns and colour combinations that make them suitable for functions where one would like to be dressed up. These boots could really add glamour to a business suit or an elegantly cut dress, but the rest of the outfit should be kept simple with good coordination. Anything goes to the dresser up a bit with their signature designs, from colourful designs to classic leather types. Winter layers of warm knit or summer outfits complement Django & Juliette boots amazingly in any season. Having a pair gets you a sleek and versatile alternative that goes well with almost every ensemble.
Where to Look for End-of-Season Sales to Find Django and Juliette Boot Discounts
Perhaps the best time to buy Django & Juliette shoes is during the end season sales. This is because most of the deeply discounted products are usually available during the end season Django and Juliette boots sale, which comes along with a discount of anywhere between 20% and 50%. Provided that you can plan ahead well enough, you could get a better deal if you wait until the retailer has an end-of-season sale in order to clear its warehouse for new merchandise. Be careful about the transition when the store is taking inventory in early spring or fall. Be wise about what you want when shopping for these sales. People seeking some really classic minimalist items that they can wear comfortably throughout the seasons should get boots that are in neutral colorations such as black or brown. The nice thing about the trends is that it really does not make it difficult to incorporate into your wardrobe. More likely, they will not be out of fashion any time soon either. End-of-season sales, though, are a great chance to acquire more quirky and flashy designs at an almost negligible price. If you’re feeling adventurous, give your shoe collection a bit of spice by adding a particularly funky design or one that’s truly bright. Sign up to receive emails from online stores that carry Django and Juliette boots sale to get savings on your purchases. Many retailers give subscribers access to sales before public have that availability, so you might get there when it’s less busy and find the best fashion deals. Monitor your favourite retailers on social media, too. Many retailers are happy to offer flash sale and short-time sale alerts when those go live. You’ll have a chance to browse through several web sites just to know what to expect and get some price comparisons on your favourite style when shopping online at discount prices. You would really get a real bargain on these quality boots if you were willing to wait and be well-prepared for the possible wait.
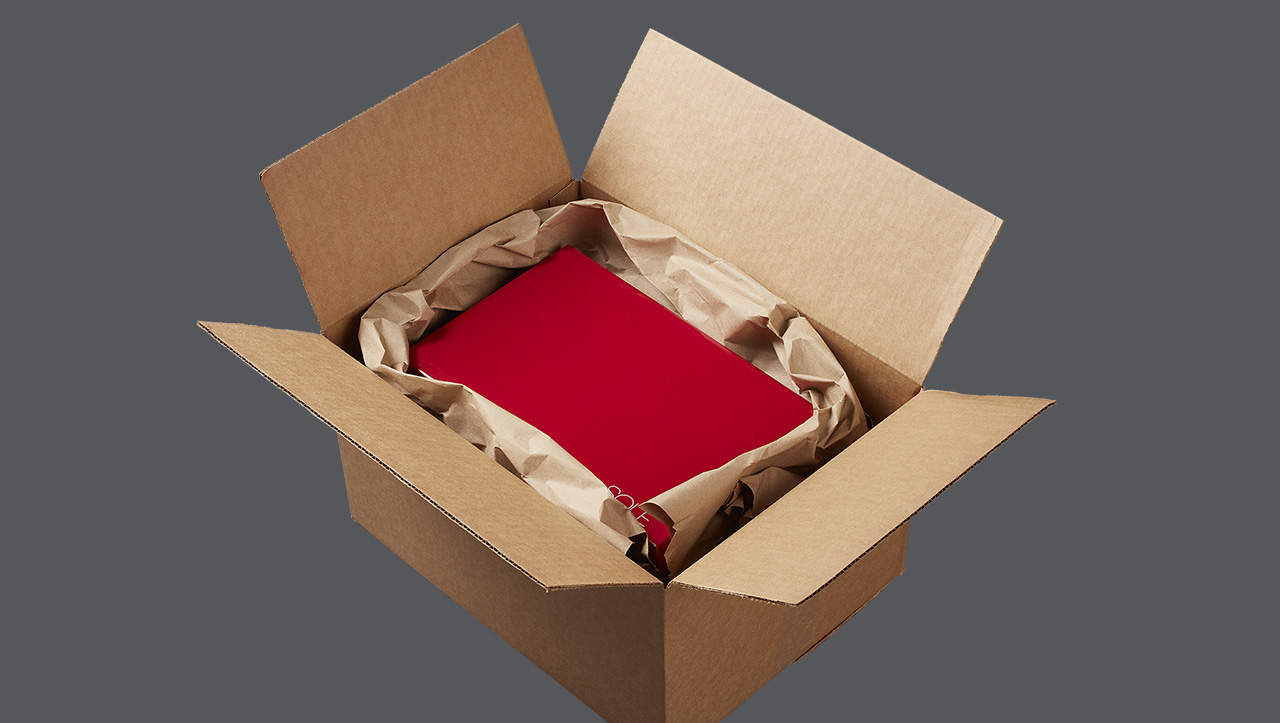
In the world of packaging, finding eco-friendly solutions is more crucial than ever. One such solution gaining popularity is paper void fill. But how does it work, and why is it considered sustainable? Let’s dive into the details.
What is Void Fill?
Before we delve into the specifics of paper void fill, let’s first understand what void fill is all about. Void filler materials are used in packaging to fill empty spaces within boxes or containers. The primary purpose is to prevent items from shifting during transit and to provide cushioning to protect against damage.
Traditionally, void fill materials have been made from materials like polystyrene foam or plastic air pillows. While effective, these materials pose significant environmental challenges due to their non-biodegradable nature.
Introducing Paper Void Fill
Paper void fill, on the other hand, offers a sustainable alternative. Made from recycled paper or renewable sources like Kraft paper, it provides excellent cushioning while being biodegradable and recyclable. But how does it work?
How Paper Void Fill Works
Paper void fill comes in various forms, including crumpled paper, shredded paper, or paper pads. The idea is simple yet effective: these paper materials are placed inside shipping boxes to fill empty spaces around products, ensuring they remain secure during transportation.
When an item is placed in a box for shipping, it’s essential to ensure there’s minimal movement during transit. Paper void fill achieves this by conforming to the shape of the product and the box, effectively immobilizing the item and preventing it from shifting or bouncing around.
Advantages of Paper Void Fill
Now that we understand how paper void fill works, let’s explore why it’s considered a sustainable choice for packaging:
- Biodegradable: Unlike traditional void fill materials, paper void fill is biodegradable. This means that once it reaches the end of its life cycle, it can break down naturally without causing harm to the environment.
- Recyclable: Paper void fill can be easily recycled along with other paper products, reducing the amount of waste sent to landfills.
- Renewable: Many paper void fill products are made from recycled paper or sustainably sourced paper, making them a renewable resource.
- Effective Cushioning: Despite being eco-friendly, paper void fill doesn’t compromise on performance. It provides excellent cushioning to protect fragile items during transit, ensuring they arrive at their destination intact.
Sustainable Void Fill Solutions
As businesses and consumers alike become more environmentally conscious, the demand for sustainable void fill continues to rise. Paper void fill emerges as a frontrunner in this quest for sustainability, offering a viable alternative to traditional packaging materials.
By incorporating paper void fill into their packaging strategies, businesses can reduce their carbon footprint and demonstrate their commitment to environmental stewardship. Additionally, consumers are increasingly favoring brands that prioritize sustainability, making eco-friendly packaging choices a win-win for both businesses and the planet.
Conclusion
In conclusion, paper void fill presents a sustainable solution for packaging, offering effective cushioning while minimizing environmental impact. By understanding how paper void fill works and its advantages over traditional void fill materials, businesses can make informed decisions to embrace sustainability in their packaging practices.
As the demand for eco-friendly packaging continues to grow, paper void fill stands out as a practical and environmentally responsible choice. By making the switch to paper void fill, businesses can not only protect their products during transit but also contribute to a healthier planet for future generations.
Incorporating sustainable practices like paper void fill is a step in the right direction towards building a more environmentally conscious world. Let’s embrace the power of paper void fill and pave the way for a greener future.

 Business5 years ago
Find out how useful a loan is without a credit check
- Digital Marketing5 years ago
Is YouTube Marketing Capable of Taking Your Business to the Next Level?
- Food5 years ago
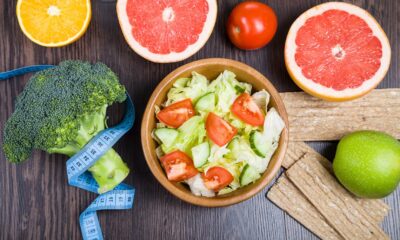
5 Best and Worst Foods for Boosting Metabolism
- Business4 years ago
Content Creation Tips Every Digital Manager Needs to Know
- Business4 years ago
Best Workplace Upgrade
- Lifestyle4 years ago
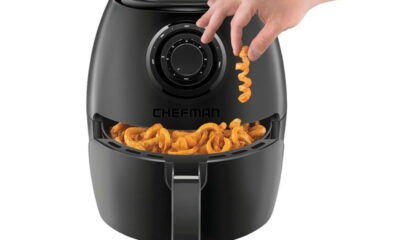
How to Choose the Best Air Fryer for Me
 Fashion4 years ago
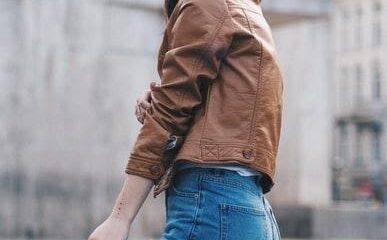
8 Top Leather Jacket Picks To Try Out This Year
- Tech5 years ago
Food Lion Employee Login at ws4.delhaize.com – MyHR4U